使用自定义应用程序验证和监控 Azure 资源
通过在 Microsoft Azure 门户中创建自定义应用程序并将必要的权限分配给自定义应用程序以使 Site24x7 能够继续进行资源发现和监视,Site24x7 可以发现和监视 Azure 资源。
自定义应用创建涉及三个主要部分:
第 1 部分:创建 Azure Active Directory 应用程序
- 登录到 Microsoft Azure 门户并导航到Azure Active Directory部分。

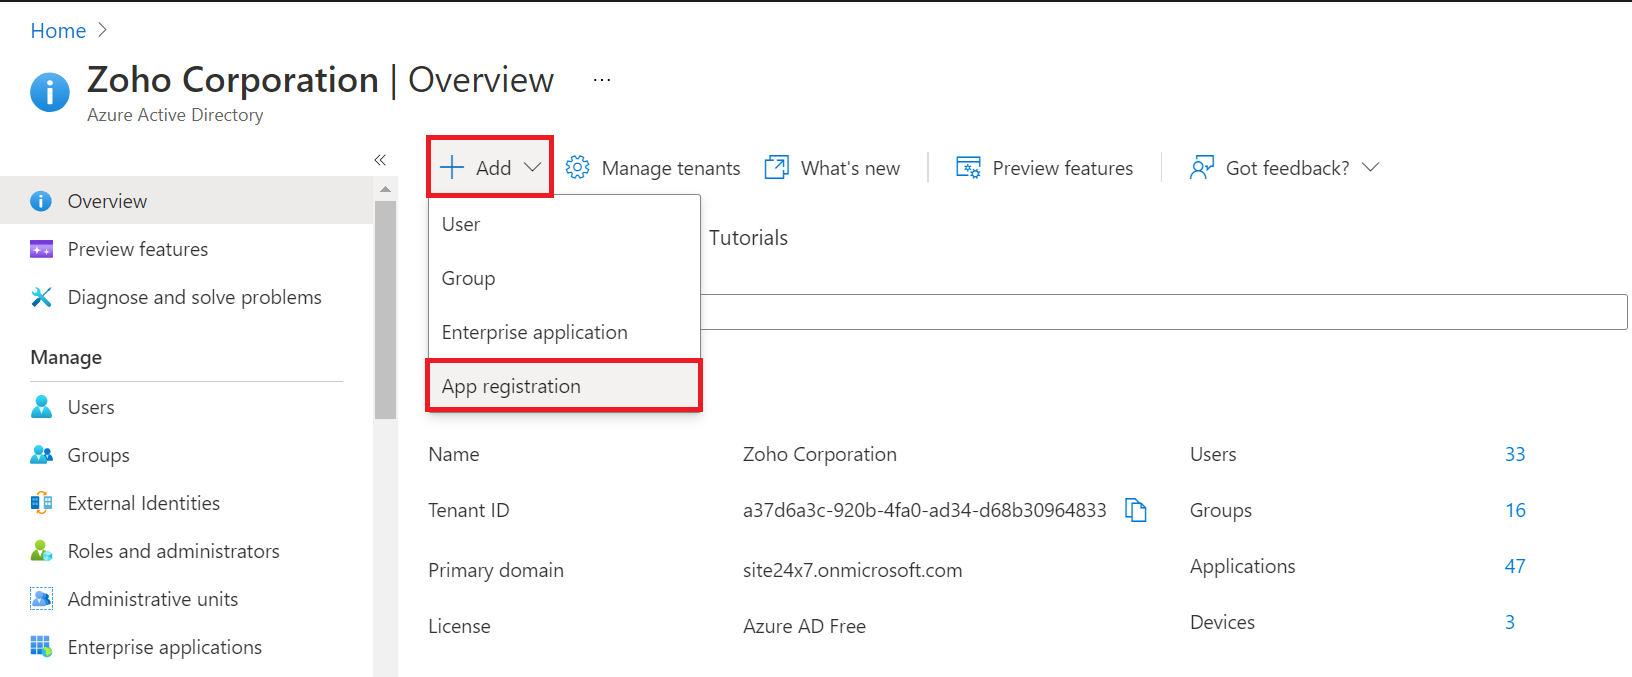
- 点击+ 添加> 应用注册。
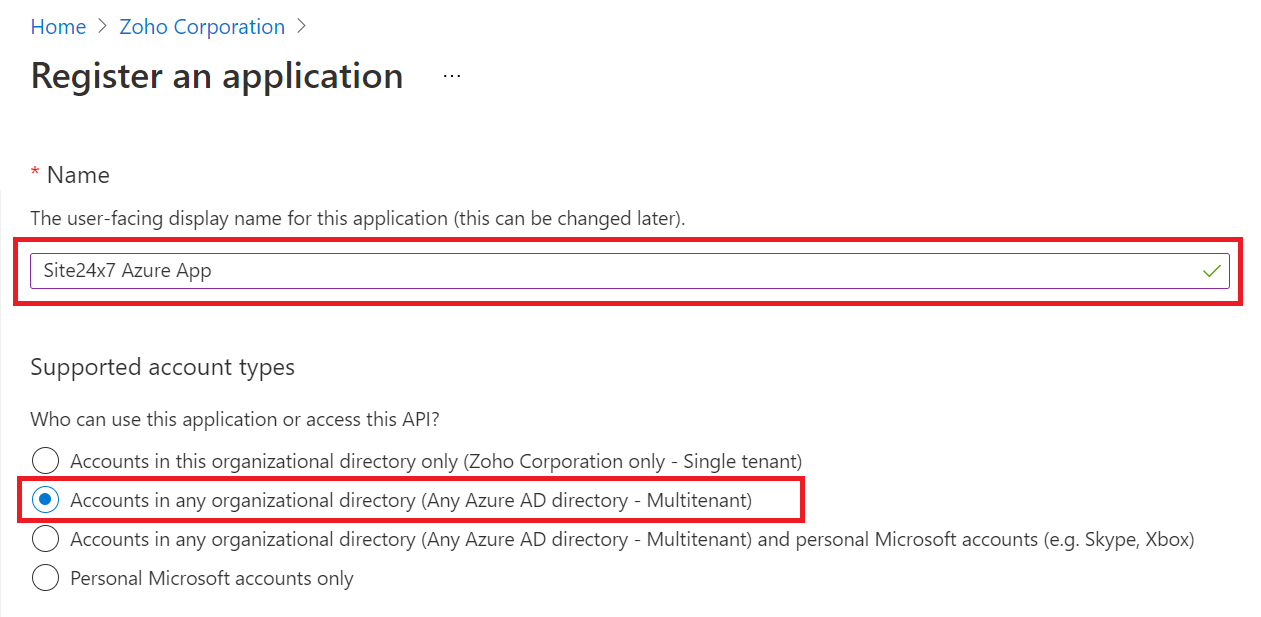
- 在注册应用程序页面中,提供应用程序的 名称,选择支持的帐户类型,并指定 重定向 URI。
- 名称:提供一个唯一的名称以便识别。示例:Site24x7 Azure 应用
- 支持的帐户类型: 在任何组织目录(任何 Azure AD 目录 - 多租户)中选择帐户。
- 重定向 URI:从下拉列表中选择Web并提及任何有效的 URL(例如: https://localhost:8080)。
点击注册。
在 Azure 门户中注册应用程序后,您将被带到一个新页面,其中包含有关该应用程序的信息。复制应用程序(客户端)ID并保存以供以后使用。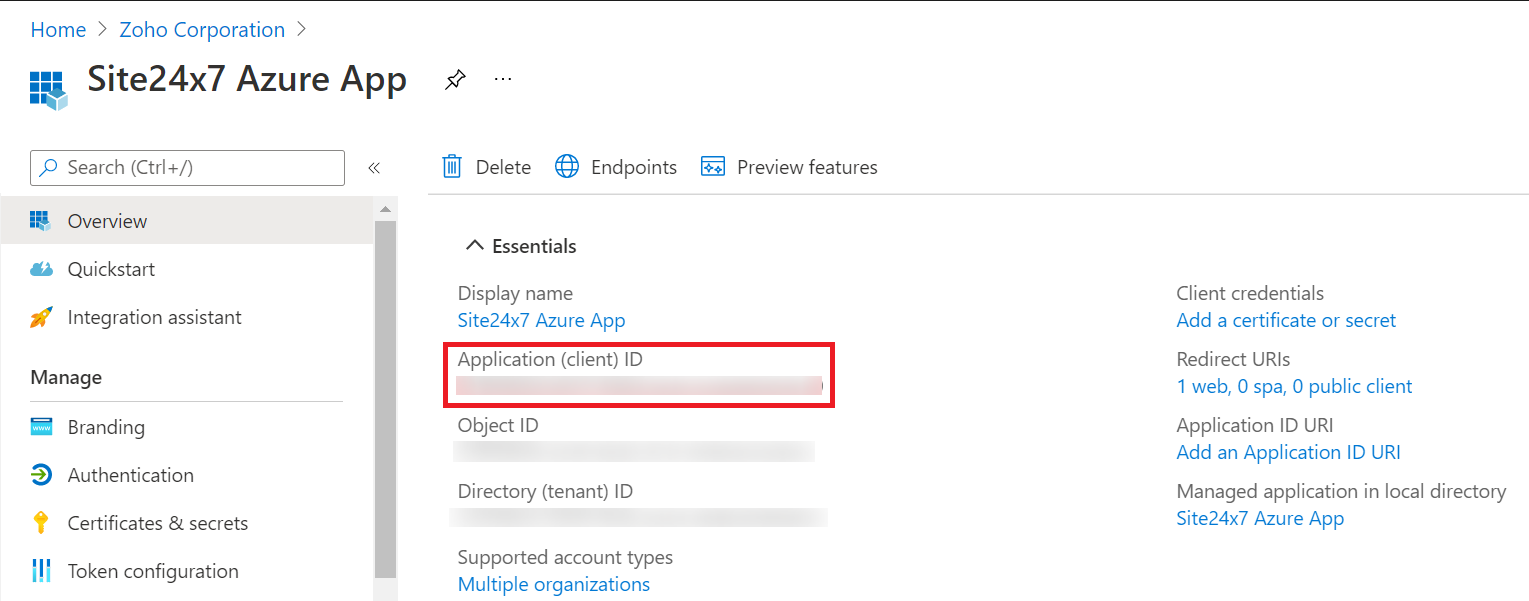
接下来,返回主页并导航到订阅> 单击您要监控的订阅 >访问控制 (IAM)> + 添加>添加角色分配。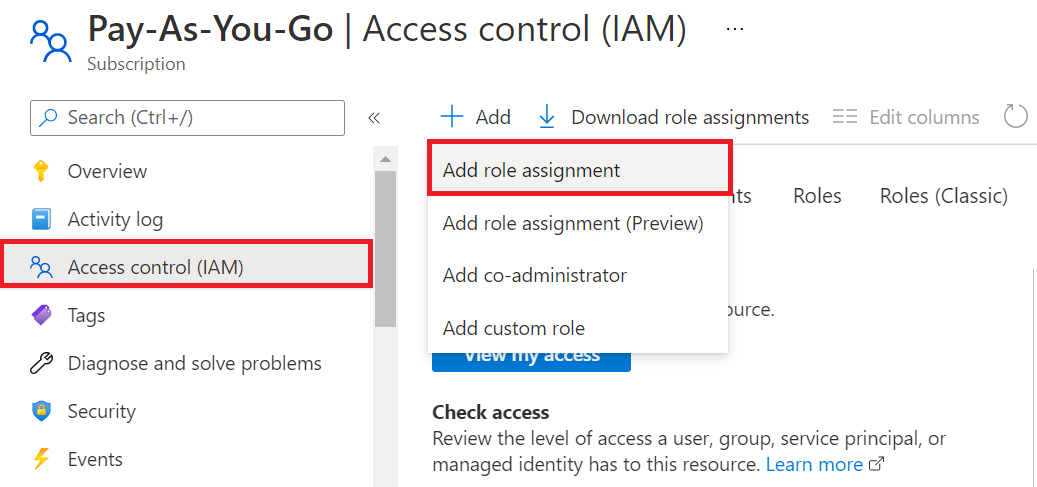
在添加角色分配页面中,选择角色作为Contributor/Reader ,为选项分配访问权限选择用户、组或服务原则,然后从下拉列表中选择您创建的自定义应用程序。保存更改。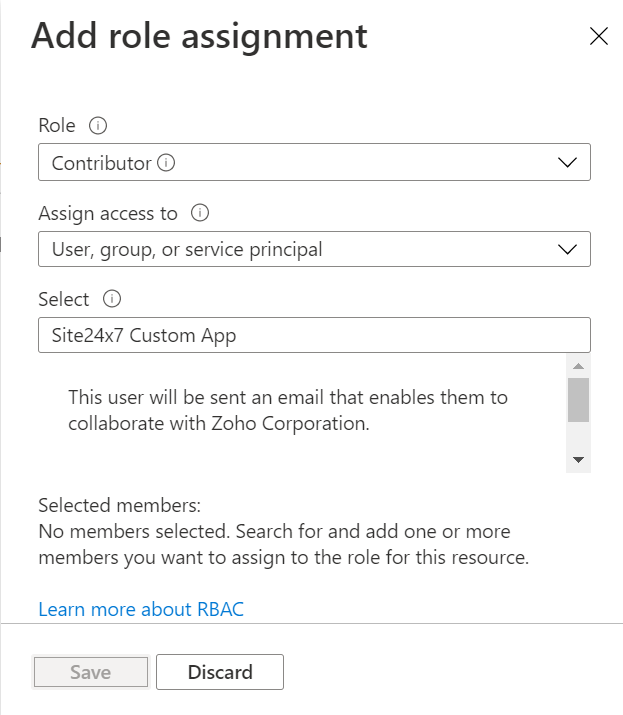
第 2 部分:为自定义应用程序提供必要的权限
- 现在,返回Azure Active Directory> App Registrations(在左侧栏中的Manage下)> 单击Owned Applications 下的应用程序名称。

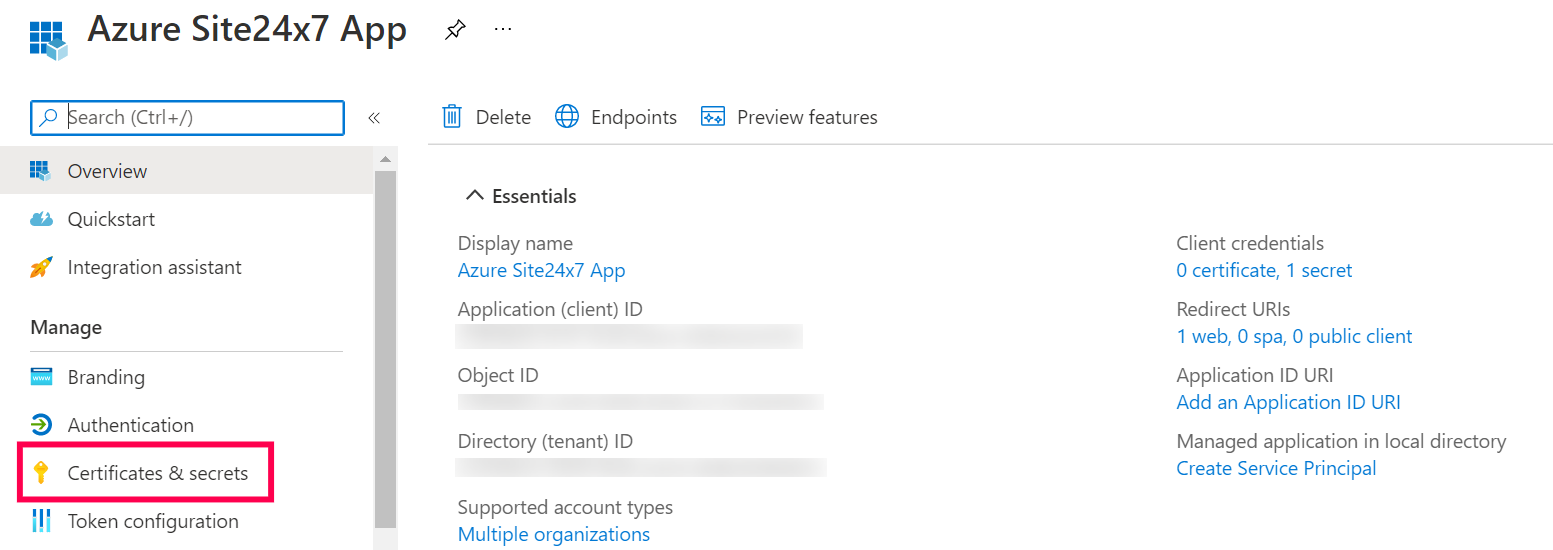
- 在管理下,单击证书和机密。
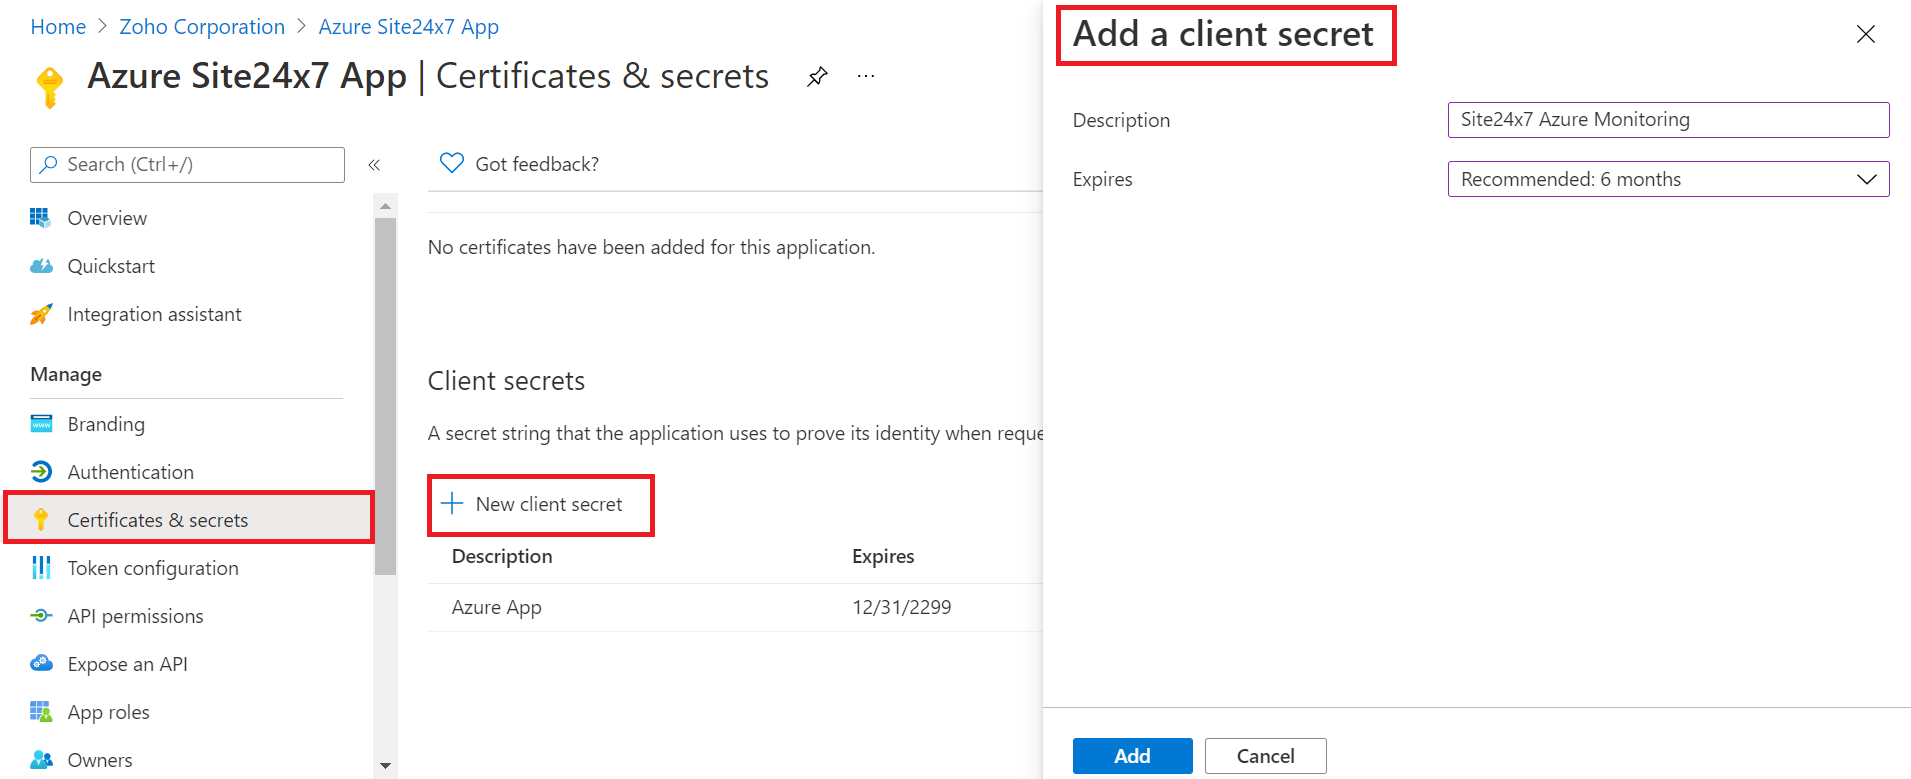
- 在客户端密码下,单击+ 新客户端密码。在添加客户密钥窗口中,提供描述,选择过期时间,推介:6个月,然后单击添加。
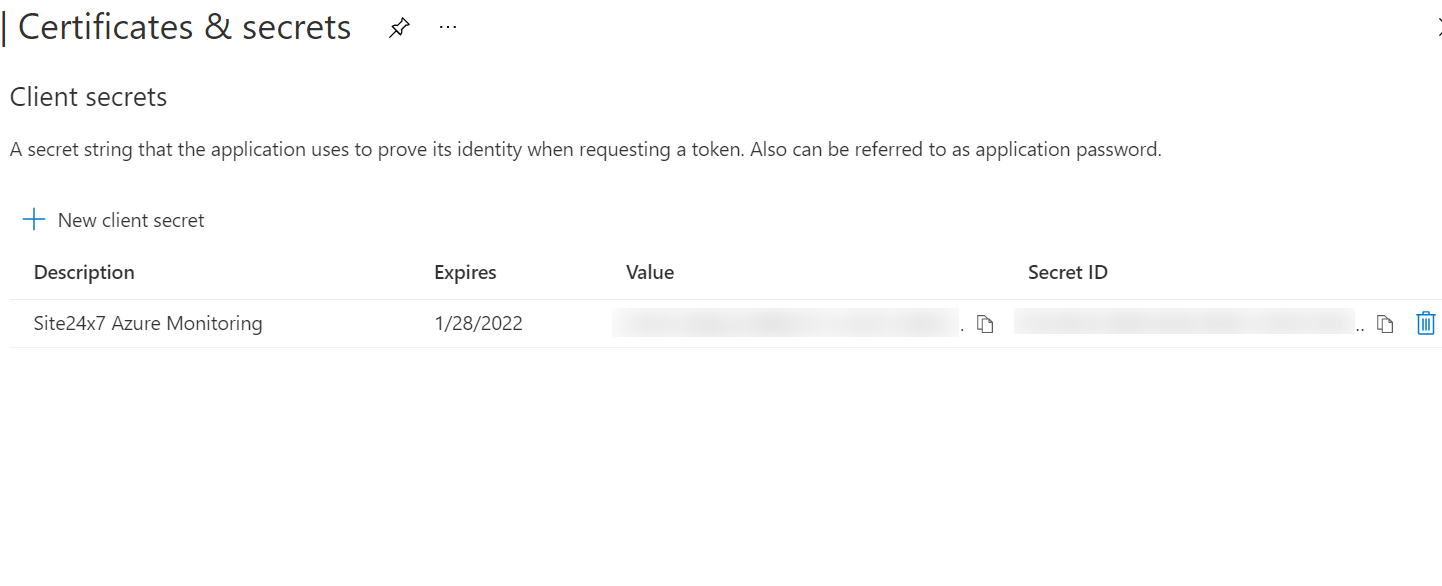
- 复制出现的Secret 值 并保存以供以后使用。这个值会在一段时间后消失。因此,保存后立即复制并粘贴该值。
转到Azure Active Directory>属性。复制提供的租户 ID并保存以备后用。
第 3 部分:在 Site24x7 Web 客户端中完成配置
- 在 Site24x7 Web 客户端中,转到Azure> Add Azure 监视器> Authenticate with Custom App。
- 将从第 2 部分:为自定义应用程序提供必要的权限中获得的租户 ID 和密钥值 分别粘贴到租户ID和 应用程序密钥字段中。将从第 1 部分:创建 Azure Active Directory 应用程序中 获得的应用程序(客户端)ID粘贴到 应用程序 ID字段中。
单击继续进行资源发现。将使用在 Azure 门户中注册的自定义应用程序发现资源。